Okay - full disclosure: I'm a Restoration Hardware junkie. Like, I can NOT go to the mall without walking through the entire store, making 3 laps. I find their furniture to be extraordinarily perfect and classy... and also, EXTREMELY expensive. (I also take like 45 pictures of everything I walk by when I'm in there so I can try to make/find it, for a lot cheaper... oops, shh!)
As much as I'd like to walk into RH and duplicate the entire store in my own home, I can't afford it, and I don't really feel like selling my left arm for a couch. I mean, come on, I'm a 25 year old new home-owner... I obviously can not spend $2000 on a coffee table and 2 side tables! I just can't!!! (except ohhh I wish I could so so so so bad).
But on that note - I'm also a huuuge consignment store junkie. Because ya know what??? You can find pieces for NEARLY nothing and work a little magic... then, abracadabra, it LOOKS like you went to Restoration Hardware, but really, you were just crafty and amazing!
This post is going to show my process, from start to finish... on how to age, distress, and Restoration Hardware-ize your used flea market finds!!
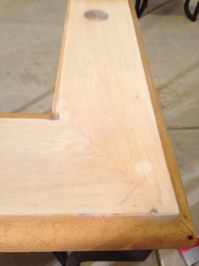
So! When I was at home visiting my parents for Christmas break, my mom took me to this little hole-in-the-wall consignment store... That's where I found THESE!
(there were glass inserts when I bought them, but I had already popped out the glass by the time I took this photo)
But you havent heard the best part yet... I got them... both... for... $15 TOTAL.
(like, not EACH... total. That's like $7.50 a piece. WHAT!)
As much as I'd like to walk into RH and duplicate the entire store in my own home, I can't afford it, and I don't really feel like selling my left arm for a couch. I mean, come on, I'm a 25 year old new home-owner... I obviously can not spend $2000 on a coffee table and 2 side tables! I just can't!!! (except ohhh I wish I could so so so so bad).
But on that note - I'm also a huuuge consignment store junkie. Because ya know what??? You can find pieces for NEARLY nothing and work a little magic... then, abracadabra, it LOOKS like you went to Restoration Hardware, but really, you were just crafty and amazing!
This post is going to show my process, from start to finish... on how to age, distress, and Restoration Hardware-ize your used flea market finds!!
So! When I was at home visiting my parents for Christmas break, my mom took me to this little hole-in-the-wall consignment store... That's where I found THESE!
(there were glass inserts when I bought them, but I had already popped out the glass by the time I took this photo)
But you havent heard the best part yet... I got them... both... for... $15 TOTAL.
(like, not EACH... total. That's like $7.50 a piece. WHAT!)
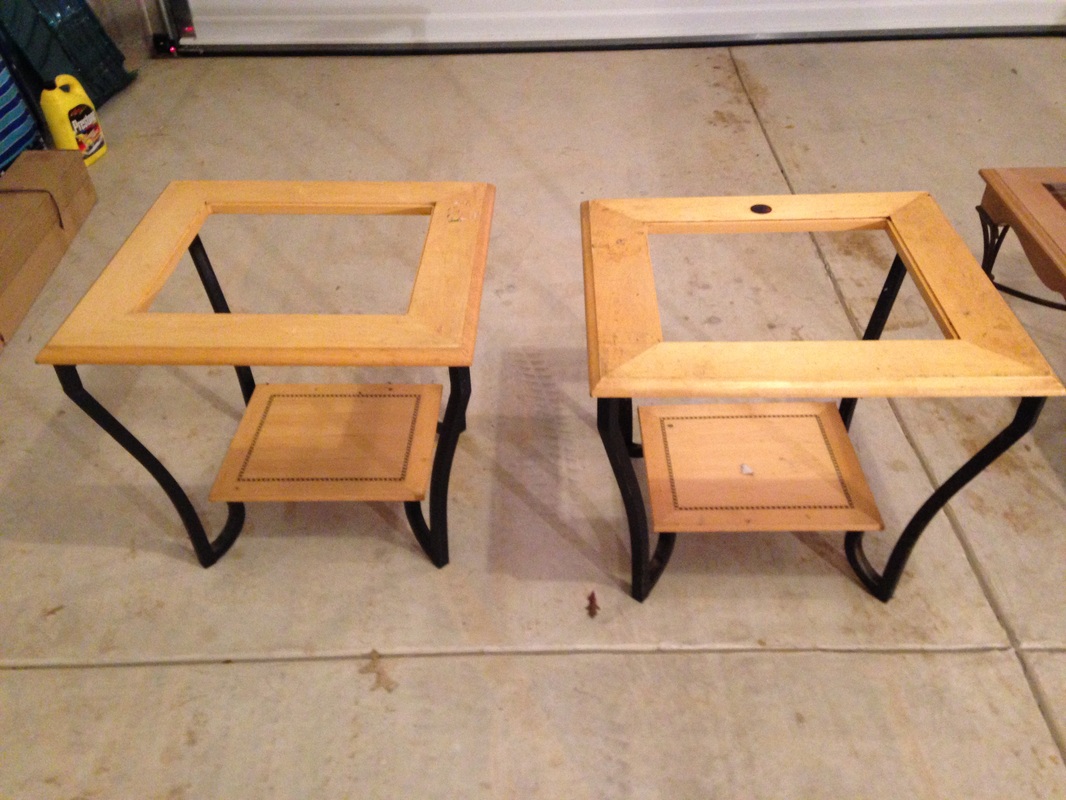
Like, WHAT?!?! RIGHT?!?!!?!??! $15!!! for both!!! I mean, I hateeee the color of them, but the bones are amazing. The black curved iron?? To die for.
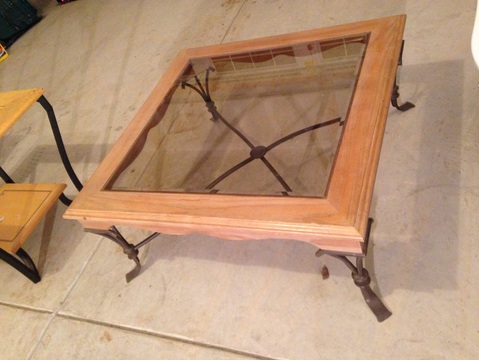
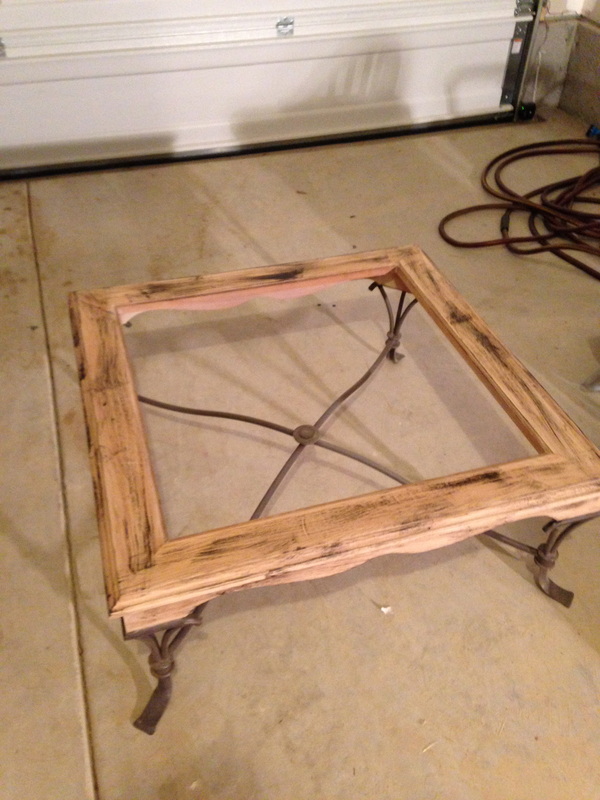
So.. I held onto those until I found a coffee table that I thought somewhat matched the side tables... then, look what I stumbled upon at a local Nashville flea market....
So.. I held onto those until I found a coffee table that I thought somewhat matched the side tables... then, look what I stumbled upon at a local Nashville flea market....
It kinda goes right?!?!?!?
The damage on this guy.... $45!!!!
So let's do a tally... instead of the $2000 I would've spent had I gotten my RH tables (for all 3).. so far, at this point, I've spent $60.
$60.
LIKE... Under $100 for all 3 tables. Way under $100! Are you still breathing?! Bc I hardly am.
(I get really excited about these kinds of deals... obviously)
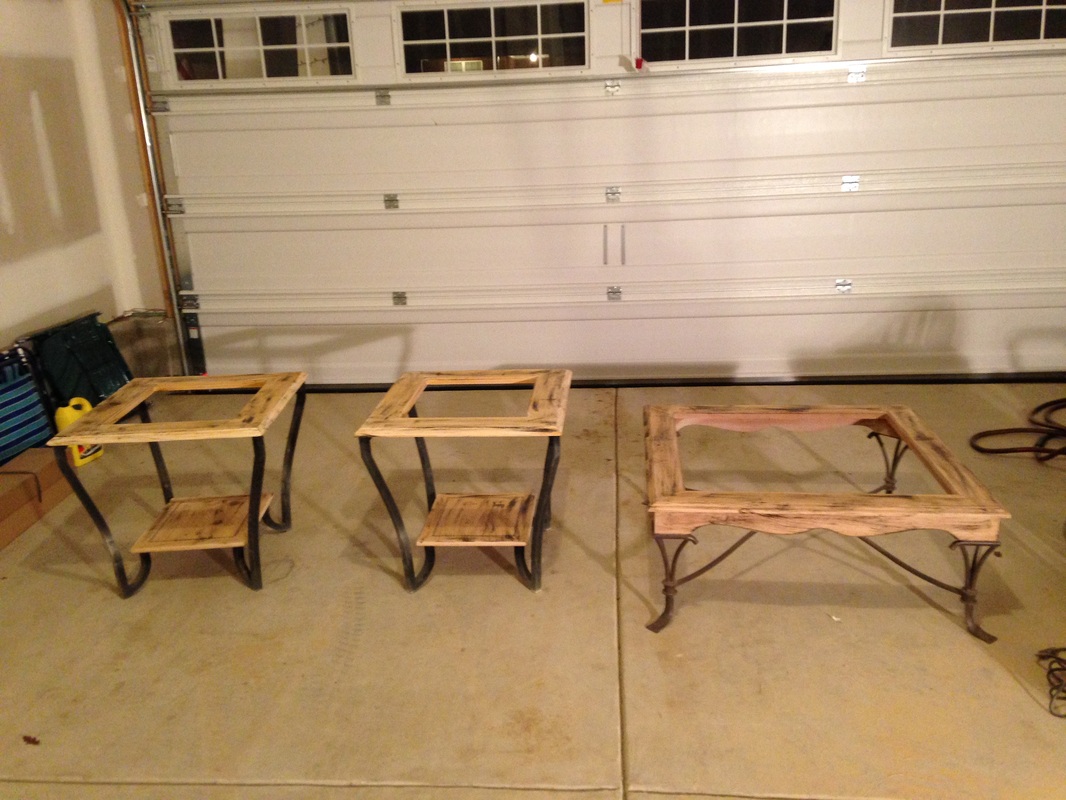
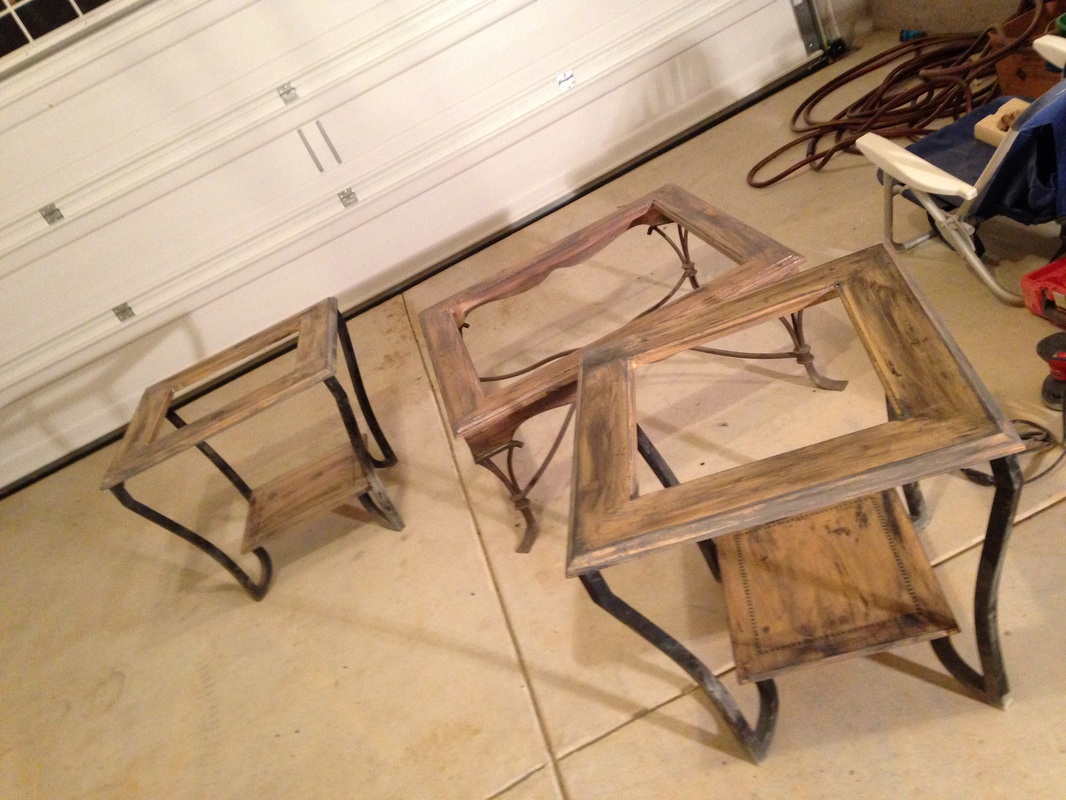
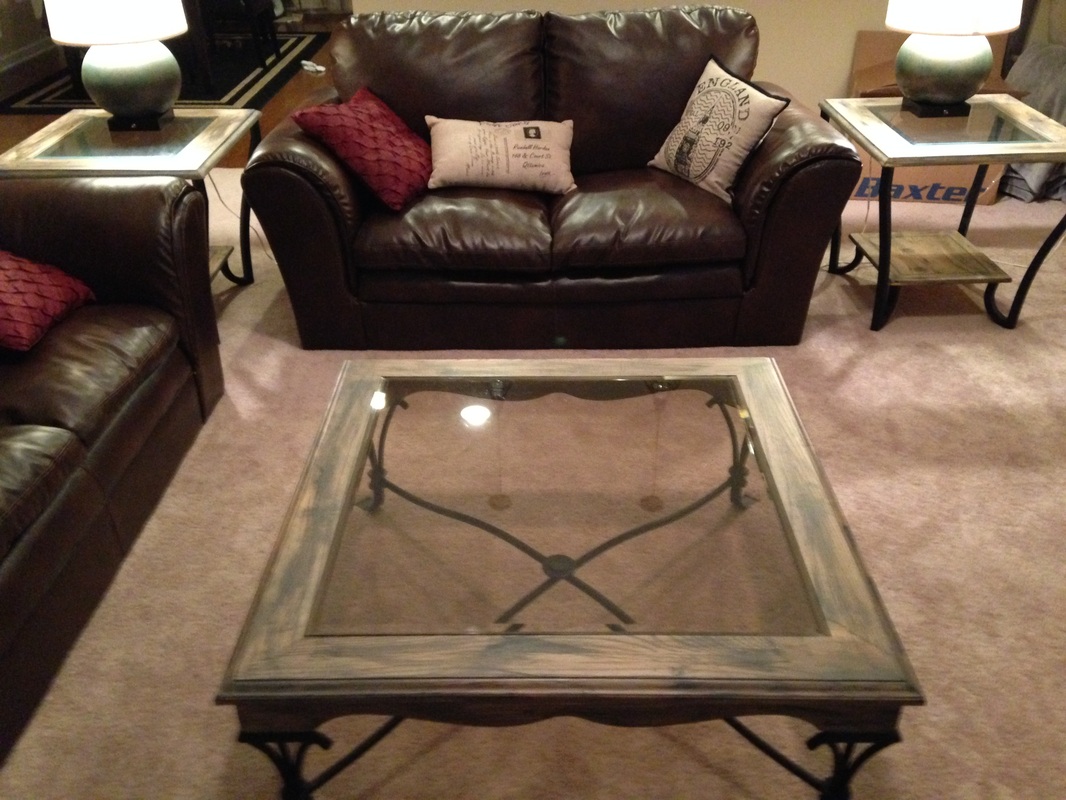
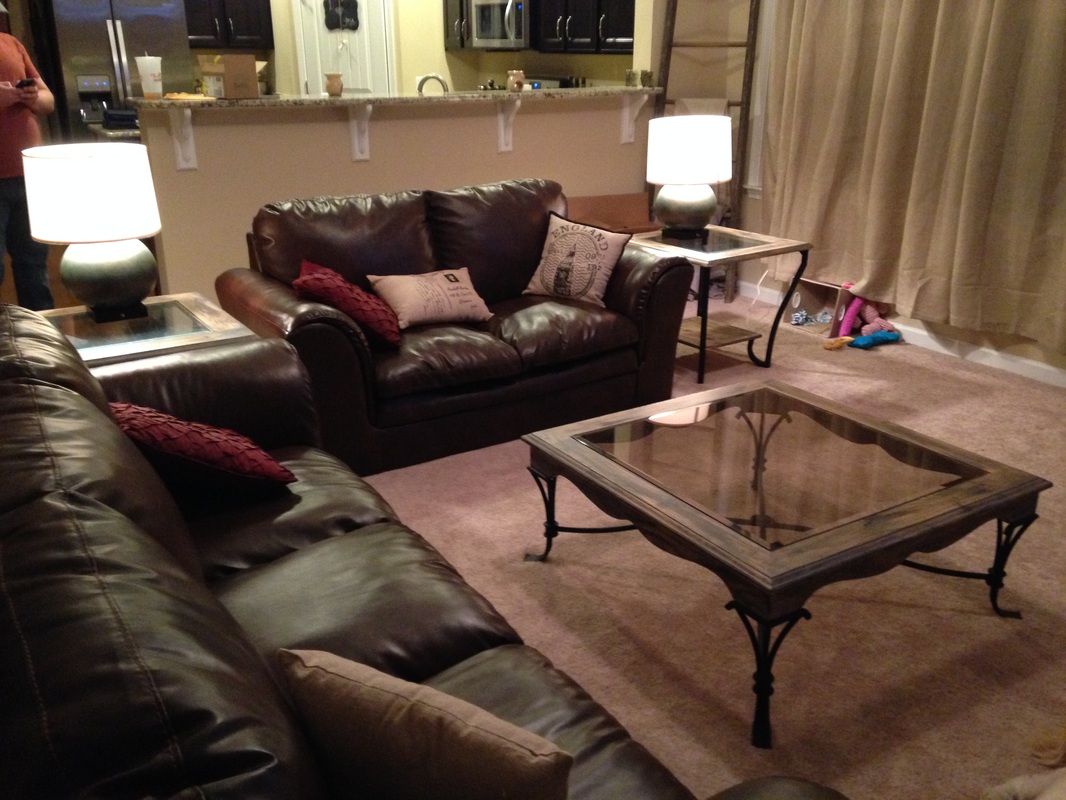
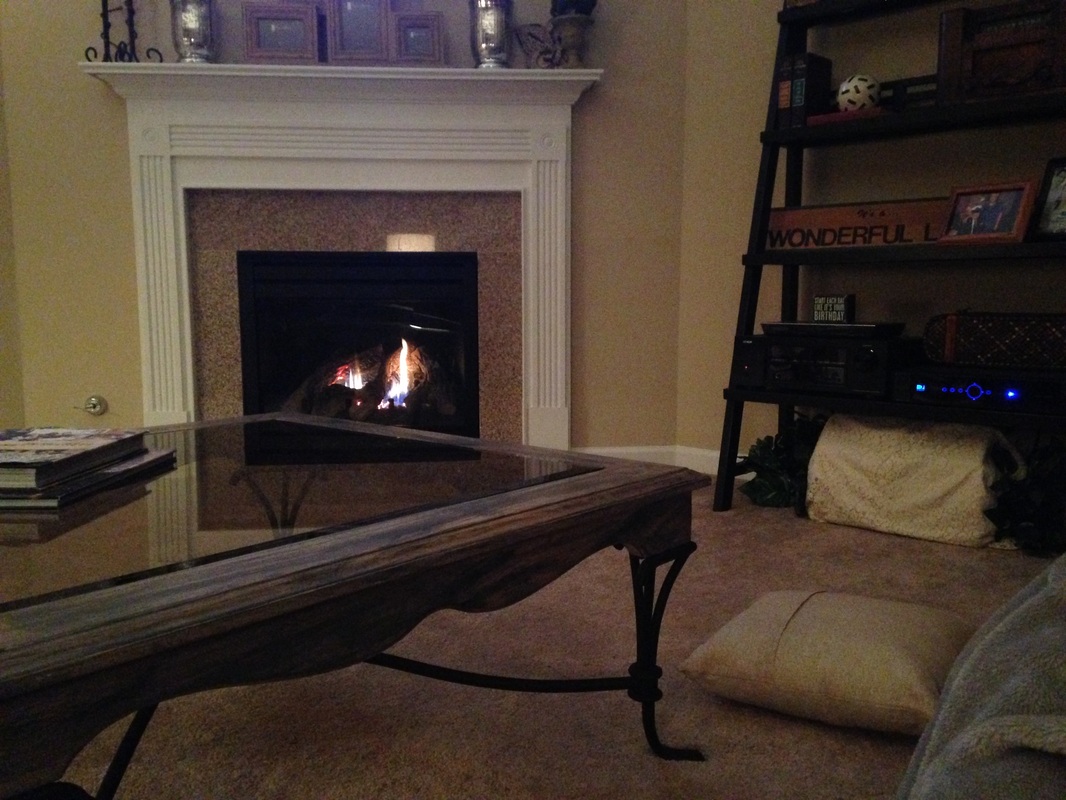
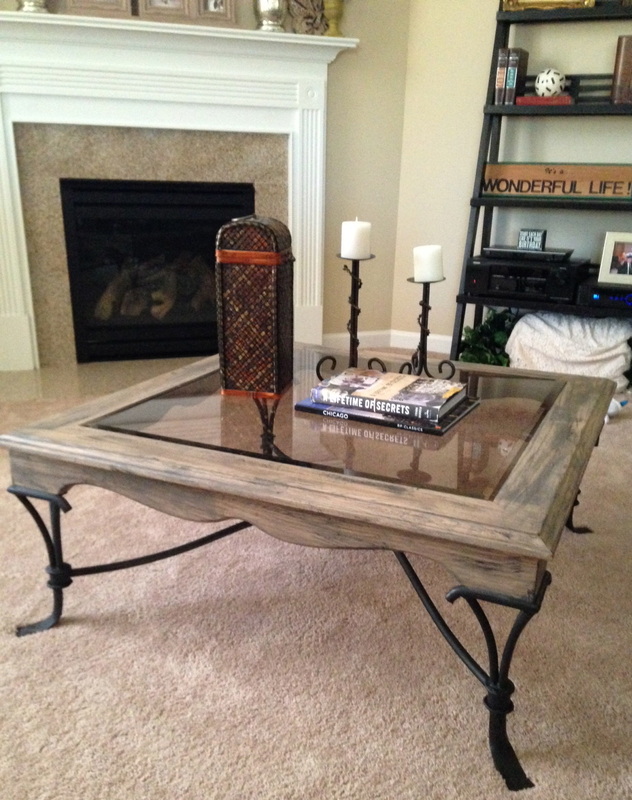
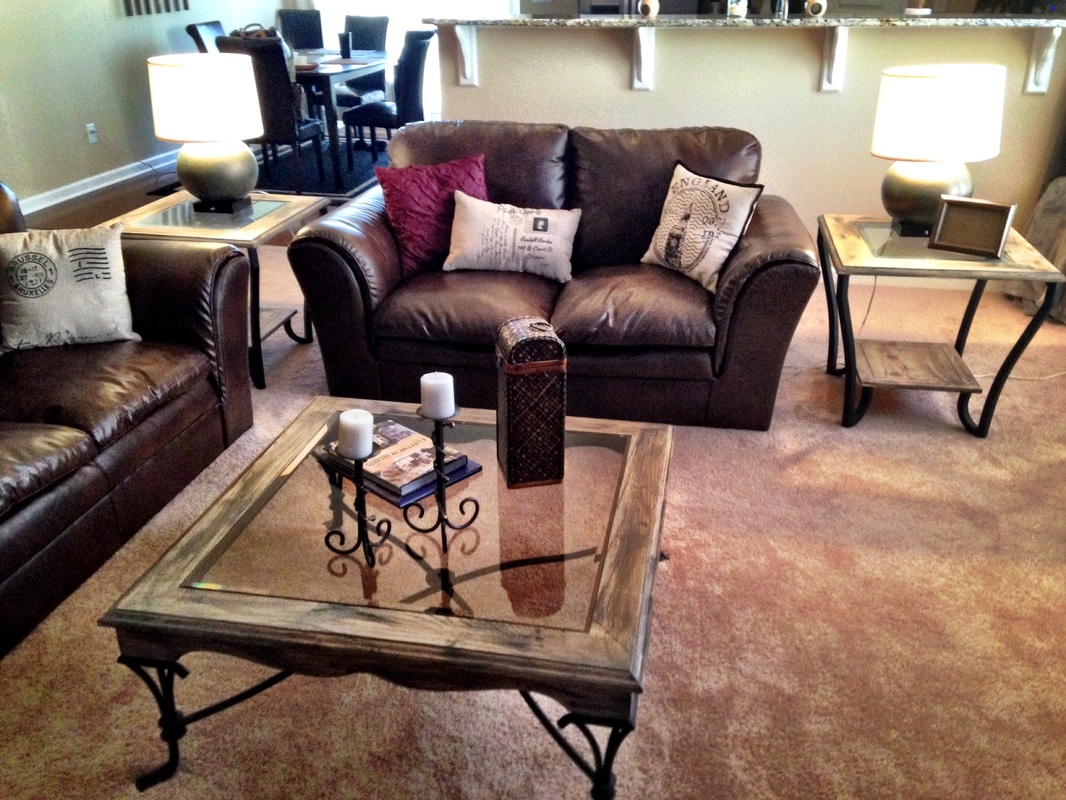
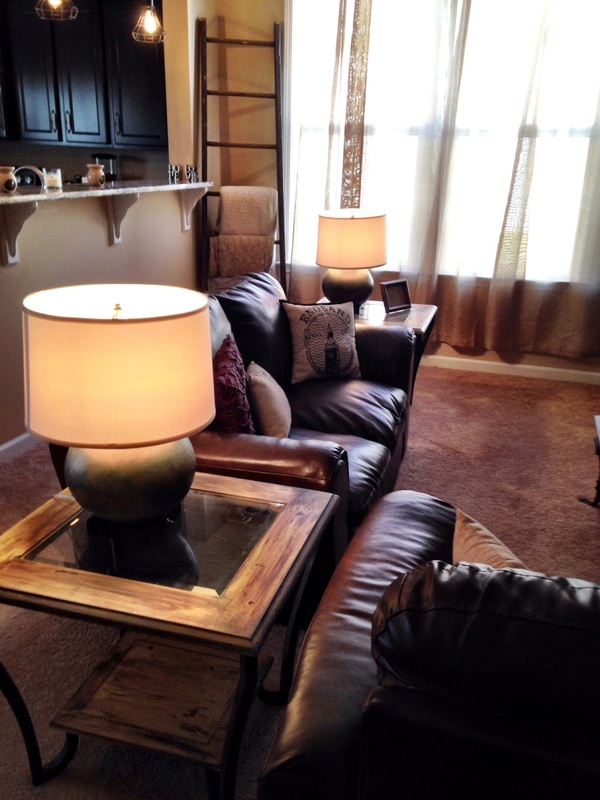
Here's all 3 pieces of furniture in all their glory... dun da da daaaa!!!!
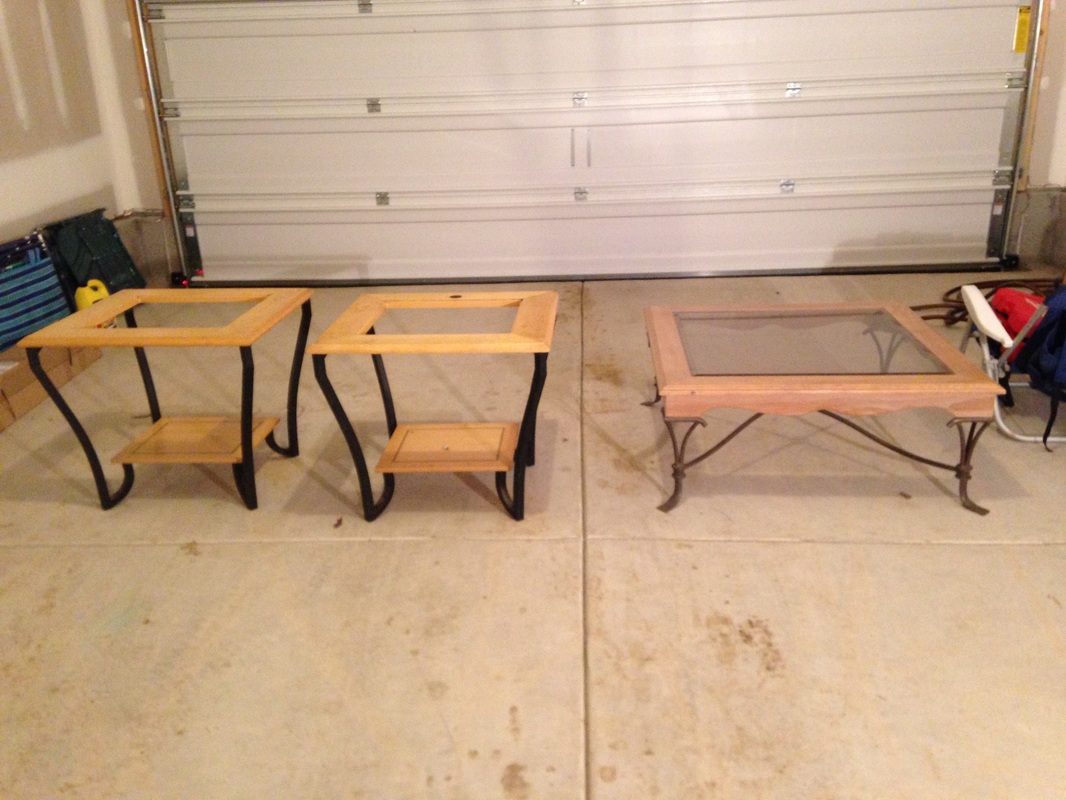
Now, I know what you're thinking... "Um.. ew, those might have been cheap, but they're UGLY! and they don't match!"
Well, my response to you, avid reader, is to hold your horses, it'll all make sense soon!
Now, DISCLOSURE: When you're making something look "Restoration Hardware-esque" you really can't go wrong. Why? Because ultimately, you're aging it. You're making it look RUSTIC and barn-like and OLD! So you could literally take a hammer to these tables and "it'll add character..." not RUIN it. So my very first tip on this project... SHAKE OFF THE WORRY. You CANT mess this up!! Isn't that exciting?! Now, get your DIY gloves on and take a deep breath... you're about to make magic.
Here are the steps in a nutshell:
Step 1) Get your supplies ready and make sure you have them all before starting the project.
Step 2) Sand Sand Sand
Step 3) Wipe down with Mineral Spirits
Step 4) Get aggressive and bang up the wood
Step 5) Dry Brush / "Age" the wood with Paint
Step 6) Stain
Step 7) Poly
Step 8) Spray paint iron *optional*
Step 9) Bask in all your glory
Sounds easy enough, right?! Well... now I'll explain each of those, step by step. Hold on... I'm about to take you on one wild DIY ride..........
Step 1)
I set out to get all my supplies...
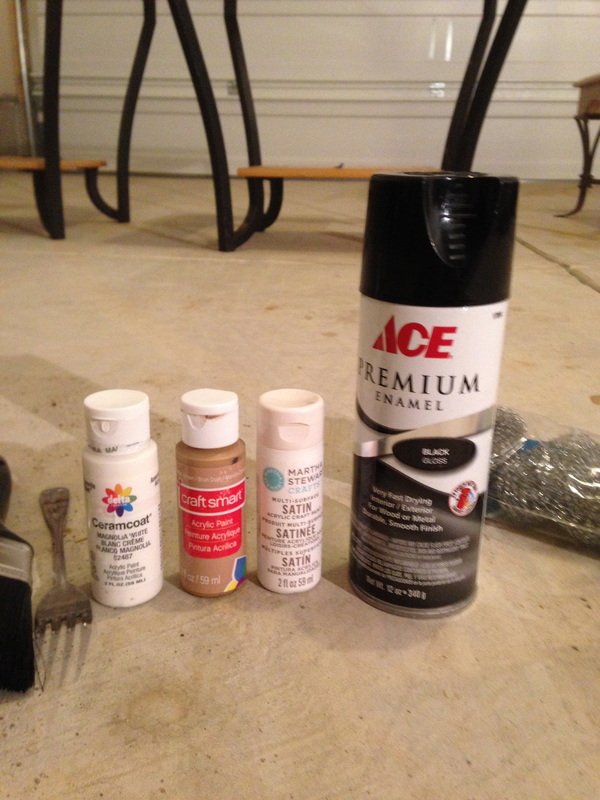
My Supply List:
-Any left over black spray paint (this was an old can from a past project)
-Cream colored craft paint
-Light brown craft paint
-White craft paint
(all of these paint colors are interchangeable, and just left over from past DIY projects... use what you have, don't make any special runs to the hardware store!)
-A fork (yes, a fork...)
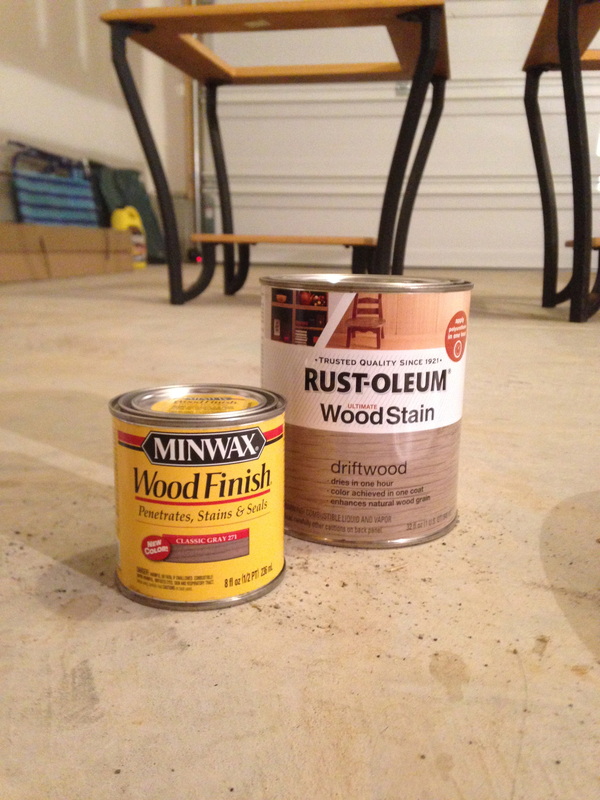
-Rust-oleum Woodstain (in Driftwood)
-Miniwax Wood Finish (in Classic Gray)
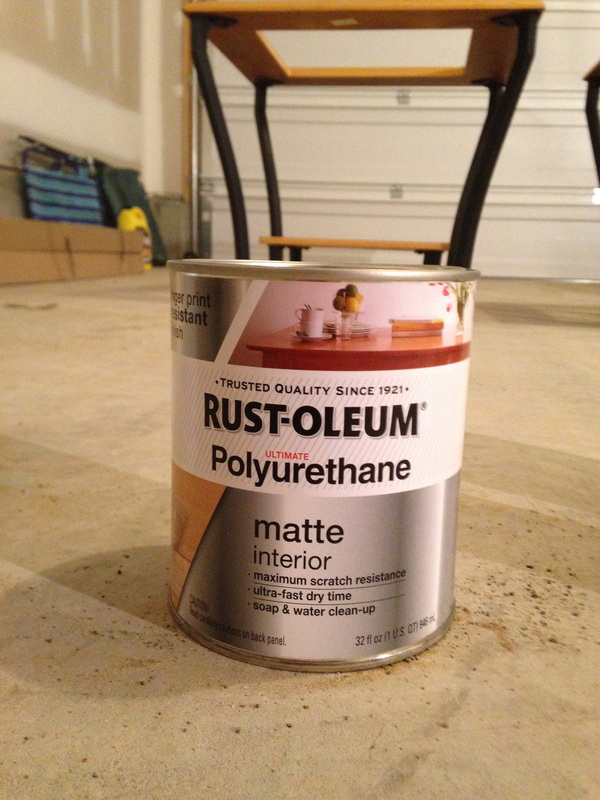
-Rust-oleum Polyurethane (MATTE interior)
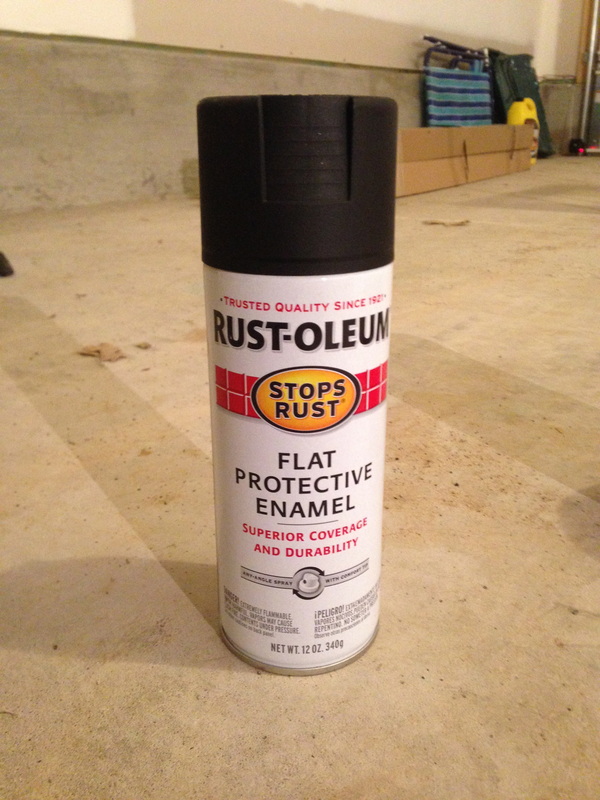
-Rust-oleum flat protective enamel (this is a matte black color as well)
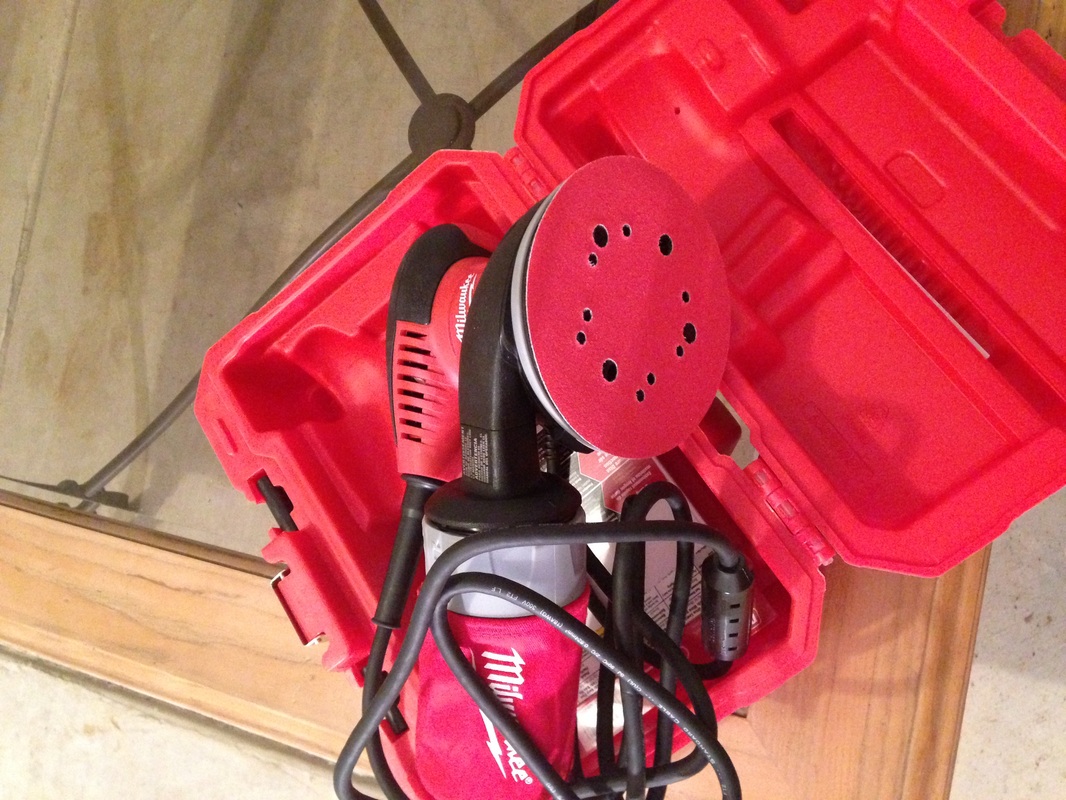
-My shiny perfectly brand new sander! (you don't have to have a sander, you can use sand paper... but trust me, using a sander cut this project time in half)
-Any left over black spray paint (this was an old can from a past project)
-Cream colored craft paint
-Light brown craft paint
-White craft paint
(all of these paint colors are interchangeable, and just left over from past DIY projects... use what you have, don't make any special runs to the hardware store!)
-A fork (yes, a fork...)
-Rust-oleum Woodstain (in Driftwood)
-Miniwax Wood Finish (in Classic Gray)
-Rust-oleum Polyurethane (MATTE interior)
-Rust-oleum flat protective enamel (this is a matte black color as well)
-My shiny perfectly brand new sander! (you don't have to have a sander, you can use sand paper... but trust me, using a sander cut this project time in half)
Step 2)
Start sanding your heart out.
This is BY FAR the most time consuming part of this whole project. You have to get the pieces down to the original wood for any of the stain later on to stick. So really... sand. and sand a lot. and sand hard.
Your muscles should actually HURT after sanding 3 pieces of furniture.
Call it your work out for the day...
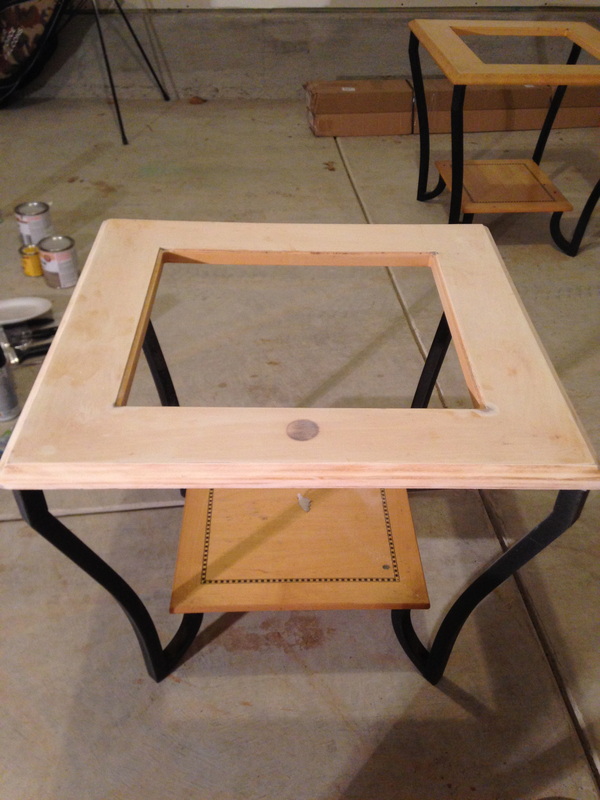


WHEW! Glad thats done... here are all 3 pieces sanded down to their original wood. And honestly, I dont have any tips for the actual sanding process. I know some furniture DIY gurus say "make sure you sand with the grain of the wood" and "bla bla bla" but honestly... just SAND them. It'll work, you really can't mess this up.
Onto step 3...
Onto step 3...

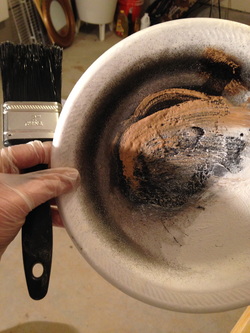
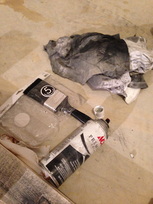
Again, I'm not a furniture guru, but on some website I read that this was a pretty vital step. So do it. I don't know why and I don't exactly think your tables are going to fall into pieces if you skip this step... I was just listening to the higher power DIY Gods, so I made a special trip (cough... I made Blain make a special trip) to Home Depot to get a can of this. It's called Mineral Spirits. And it looks like a little gasoline can of some kind.
Step 3) Wear gloves, get an old rag, and wipe down those freshly sanded tables with some Mineral Spirits. (I forgot to take a picture of this, so thanks Google image)
According to the warning label on this shiz, it's flammable and pretty intense stuff... so seriously, wear the gloves, and do this in a ventilated area.
Let that soak in / dry a bit.
NOW! Onto the FUN part!
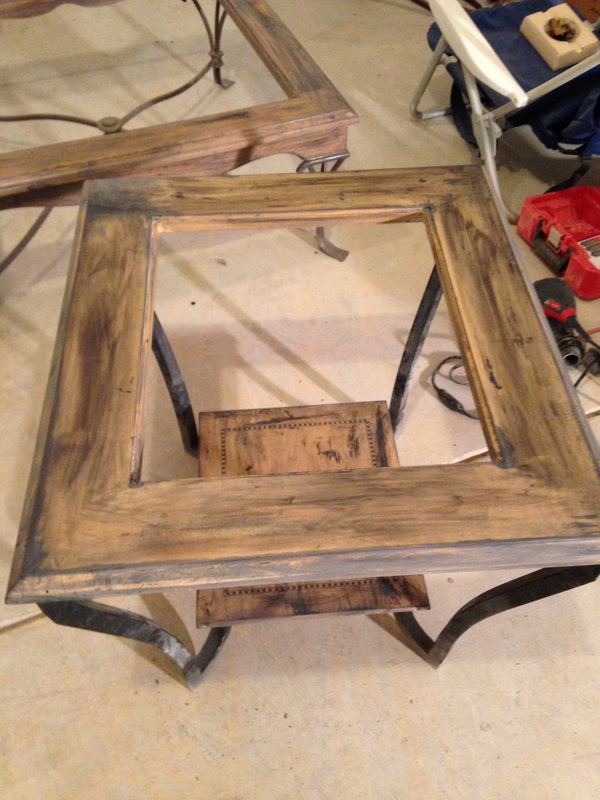
Step 4) Remember that fork I mentioned earlier in the supply list? Take it to that freshly sanded wood and just start making marks. Stab the wood, scrape the wood, do whatever you want. If you dont want to use a fork, grab a screw driver, grab a hand full of rocks... use whatever! Just rough it up a bit! Let out some aggression people!
Step 5) Now it's time to get creative, get messy, get sloppy, and get crafty! I mixed together some of that old black spray paint, white craft paint, and brown craft paint. You're going to use a method called "Dry Brushing" here. Take a DRY BRUSH (get it?) and dip it in your paint. Then, just start slapping the crap out of the wood. Brush it all over. Do not wash the brush off in a cup of water until you are very very very done. You want to keep the brush dry... (see?) and just keep brushing the wood!
YOU CAN NOT GO WRONG WITH THIS STEP. You can splatter, you can have more black in some areas, more brown in others, you can forget a section, you can mix the colors... you. can't. mess. up. My only note is to try and keep some of the lines going in the same way... it kind of gives the look of "wood grain" but with paint!

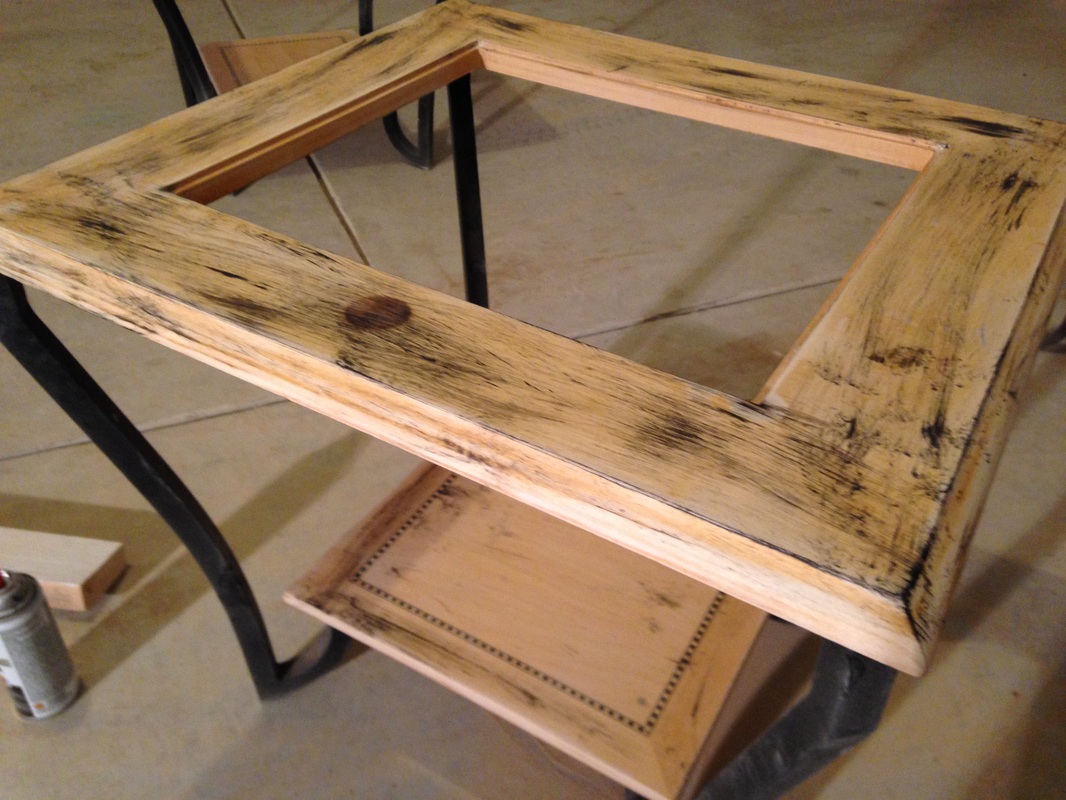
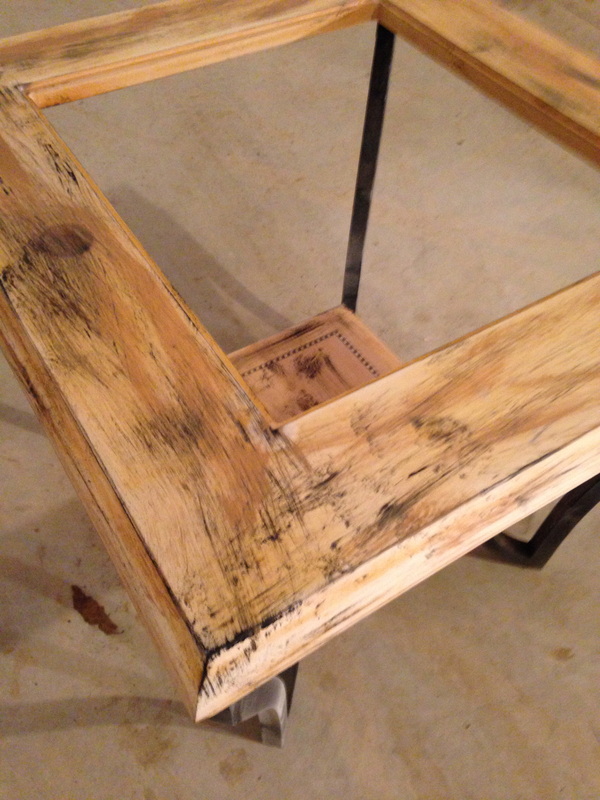
Please ignore our messy garage.
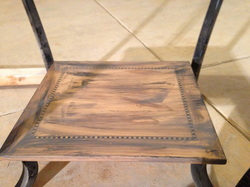
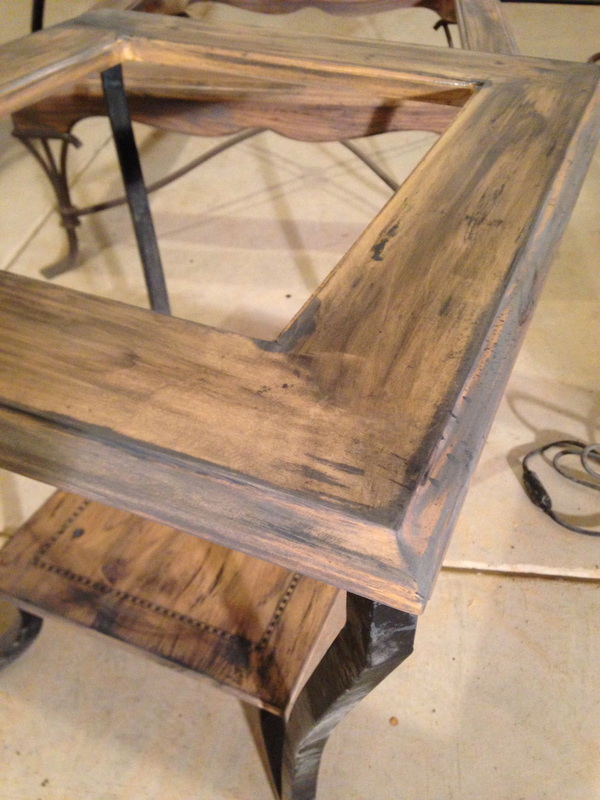
Step 6) Get an old t-shirt or rag, and start staining! All you do, is dip the rag in the stain, then wipe onto the surface of the wood. Let parts of it pool up more than others, then wipe off! Continue doing this until you reach the color of wood you're hoping for.
Each experience is going to differ a bit; there is no exact instruction sheet. That being said... my coffee table soaked in the stain really well, my side tables... not so much. So I had to improvise a bit.
Each experience is going to differ a bit; there is no exact instruction sheet. That being said... my coffee table soaked in the stain really well, my side tables... not so much. So I had to improvise a bit.
Remember that old can of black spray paint I used to dry brush? I took the same rag I was using to stain and sprayed it, then rubbed it all over my side tables. My coffee table looked great, but the side tables weren't taking the stain very well. So I had to darken them a bit, by using the spray paint! Surprisingly, it worked!
This just goes to show that like I said, you can't mess up this project. If one thing doesnt work for you... try it a different way!
Rough it up, that's the goal!
This just goes to show that like I said, you can't mess up this project. If one thing doesnt work for you... try it a different way!
Rough it up, that's the goal!
Slowly but surely.. they started to come together!
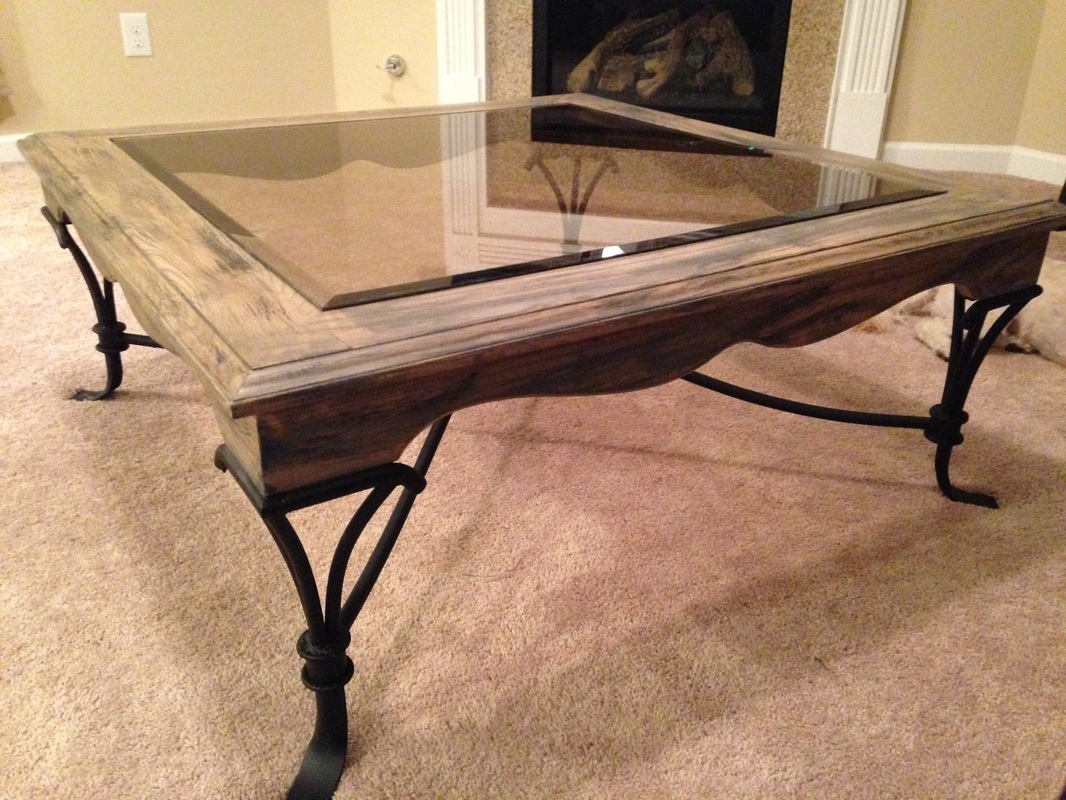
Step 7) Brush on the poly. I think each brand of Polyurethane has it's own set of directions on the back, so read the can, just to be safe. I did one coat, let it dry, then did a second, and let that dry!
Poly will set all of your crafty work. It's kind of like a top coat of nailpolish for your tables.
Now, if you have a matching set, then you're done!!! But for me, since my side tables and coffee table were different, the iron was different. The side tables had this beautiful black iron, but the coffee table iron was a lighter color. SO! To make them more cohesive... Last but not least...
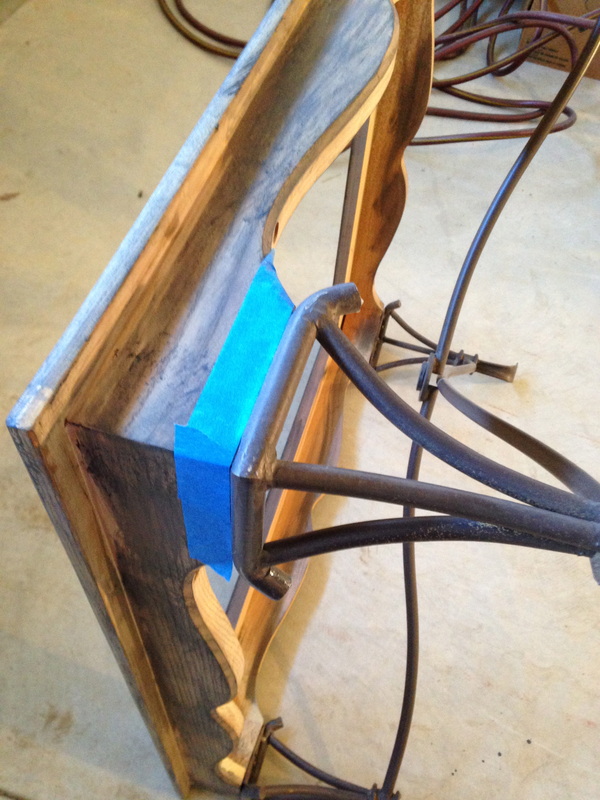
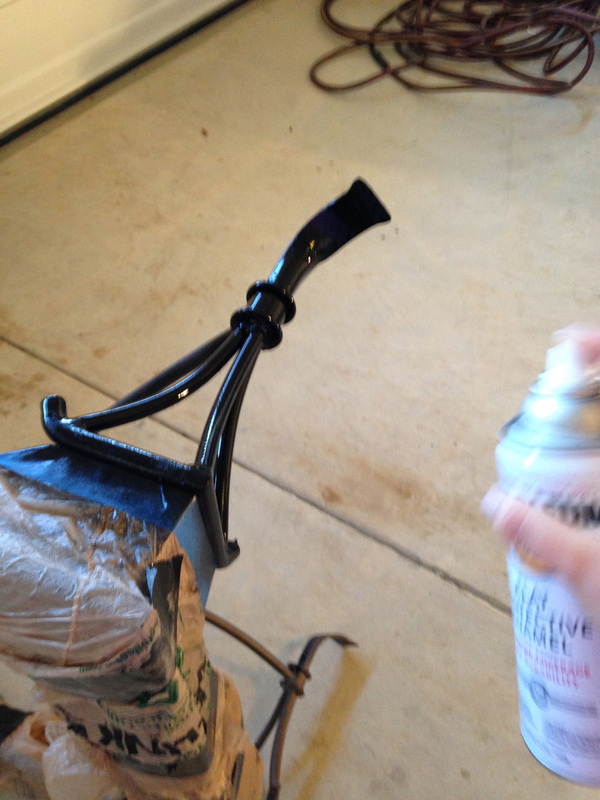
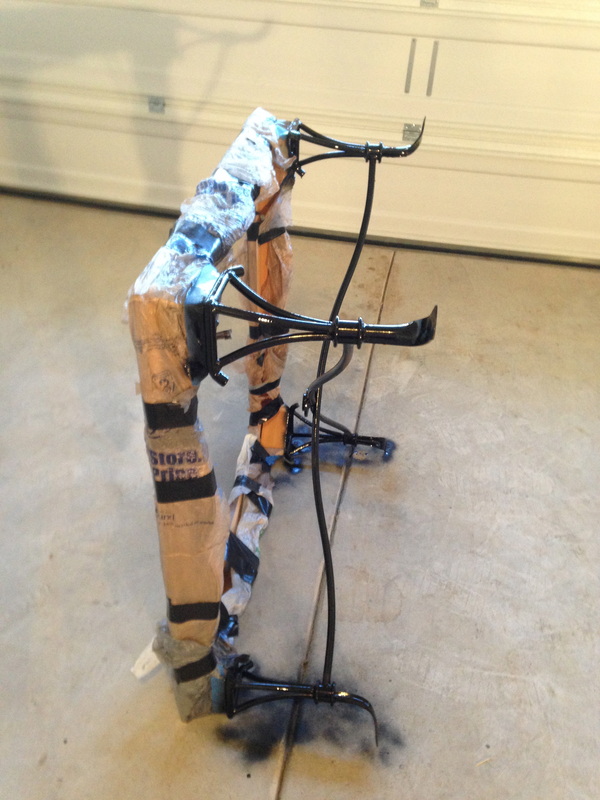
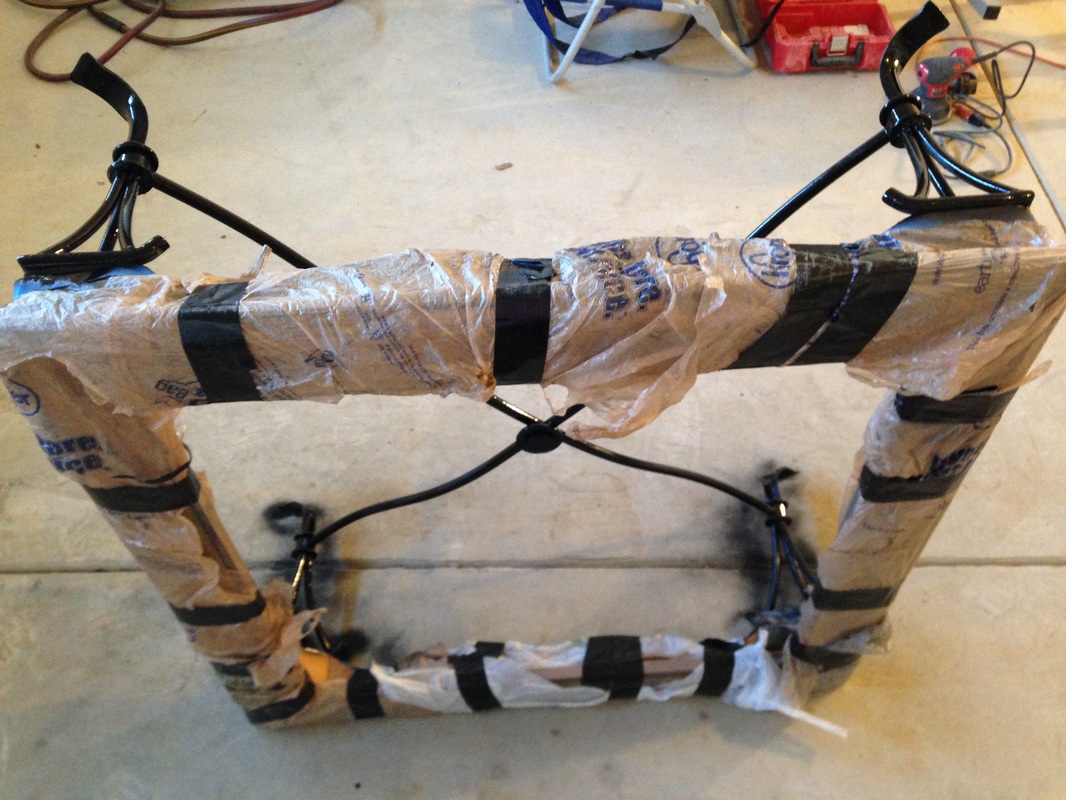
Step 8) Tape off the wood & cover in some kind of plastic (I used a beautiful mixture of Kroger and Target shopping bags) Then, I used the MATTE BLACK Flat Protective Enamel spray paint, and covered the iron work of the coffee table
Poly will set all of your crafty work. It's kind of like a top coat of nailpolish for your tables.
Now, if you have a matching set, then you're done!!! But for me, since my side tables and coffee table were different, the iron was different. The side tables had this beautiful black iron, but the coffee table iron was a lighter color. SO! To make them more cohesive... Last but not least...
Step 8) Tape off the wood & cover in some kind of plastic (I used a beautiful mixture of Kroger and Target shopping bags) Then, I used the MATTE BLACK Flat Protective Enamel spray paint, and covered the iron work of the coffee table


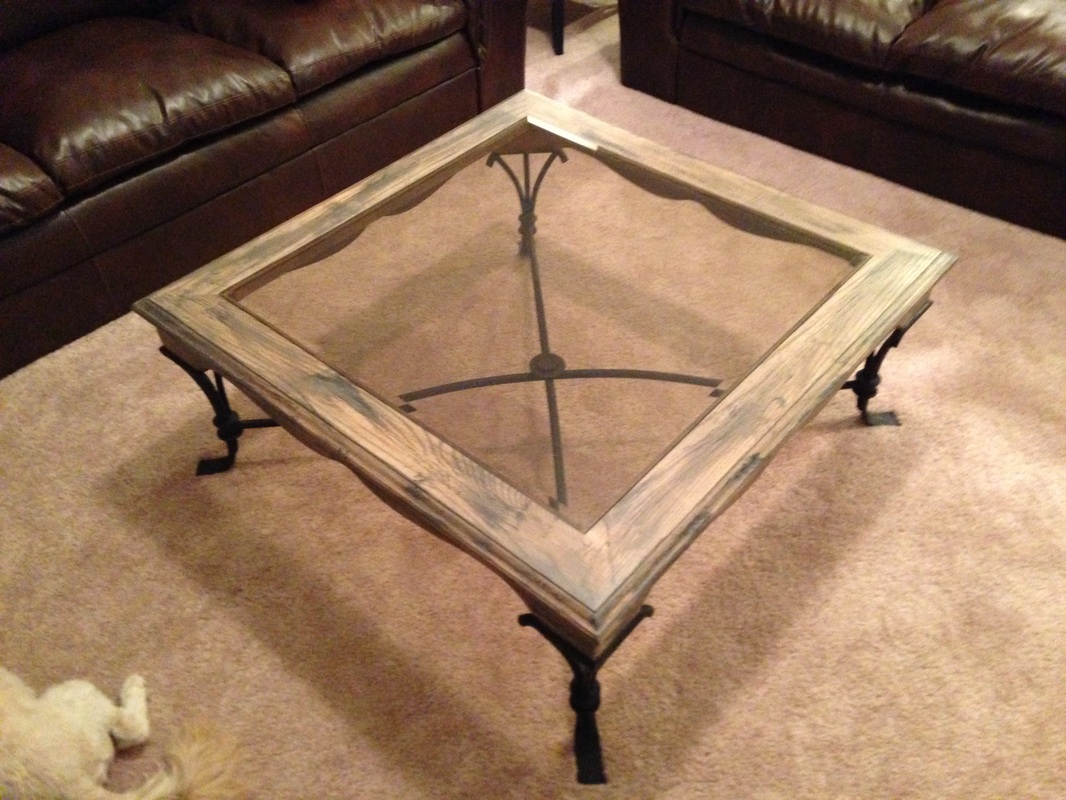
Last and final step)))))))) Let dry, then bring inside, put in your family room, decorate and LOVEEEE THEMMMMMMM. Then, let people ask you "oh! How adorable, did you get those from Restoration Hardware?!??" Then you gleam with pride and either lie and say yes or boast that you did them yourselves! ALL FOR UNDER $100!


Really really really hope you enjoyed this post and found it helpful!
Have you restored furniture? Turned clean wood into a barn wood look-alike?! If so - let me know! I'd love to see what you've done!
xox,
L
Have you restored furniture? Turned clean wood into a barn wood look-alike?! If so - let me know! I'd love to see what you've done!
xox,
L

 RSS Feed