Well.. I guess you can't really call this a "makeover" because we just built our home, so it went from a completely blank and empty room, to the fabulousness that I call my laundry room. But the moral of this post, is to show you how to do an UH-MAZING chevron wall! And let me tell you... IT'S EASY.
If you've been searching Pinterest for the perfect tutorial on how to paint a chevron wall, you've found it. Just go ahead and "x" out of all those tutorials that give you some mathematical equation... it does NOT have to be that hard. You don't have to be a brain surgeon to do this, you just have to want a chevron wall!
Are you ready?? Ok...
My supply list:
-A wall to paint (duh).
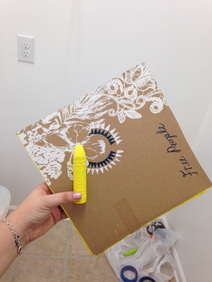
-An old cardboard box.
-A piece of chalk.
-Painters Tape.
-Paint (another duh).
-Roller brush.
-Paint Tray.
THAT'S ALL YOU NEED. LIKE, WHAT?! I KNOW. Your mind should be blown at this point, but if you give me a few more minutes, it'll all make sense...
Here are the steps in a nutshell (but pictured and explained below):
Step 1) Cut out a cardboard square
Step 2) Trace square all over wall with chalk
Step 3) Make diagonal lines
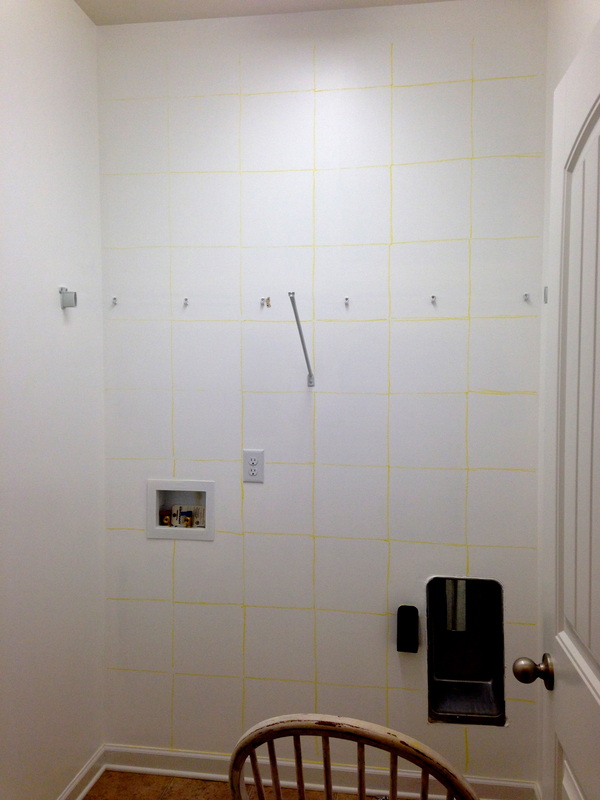
Step 4) Tape
Step 5) Paint
Step 6) Peel Tape
Step 7) Get Goosebumps
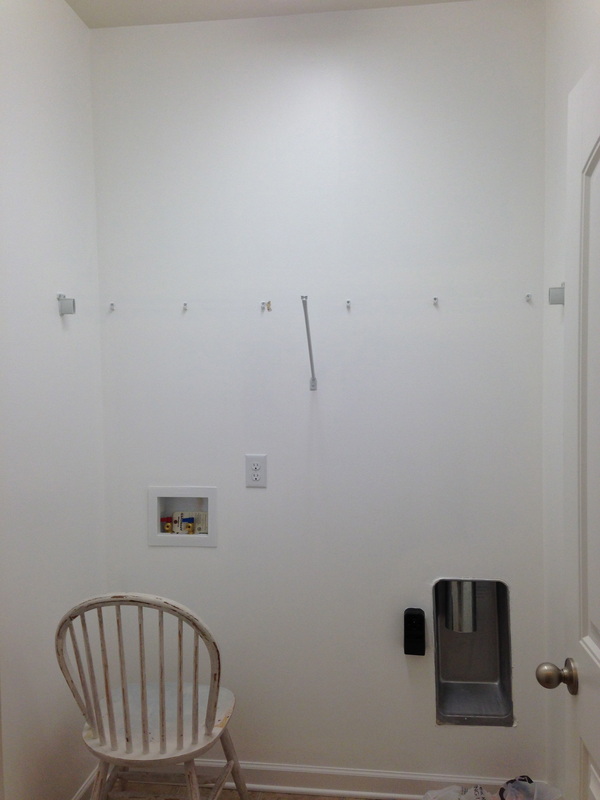
First of all... this was the original room. I hope the transition blows you away at the end with the big reveal... fingers crossed!
If you've been searching Pinterest for the perfect tutorial on how to paint a chevron wall, you've found it. Just go ahead and "x" out of all those tutorials that give you some mathematical equation... it does NOT have to be that hard. You don't have to be a brain surgeon to do this, you just have to want a chevron wall!
Are you ready?? Ok...
My supply list:
-A wall to paint (duh).
-An old cardboard box.
-A piece of chalk.
-Painters Tape.
-Paint (another duh).
-Roller brush.
-Paint Tray.
THAT'S ALL YOU NEED. LIKE, WHAT?! I KNOW. Your mind should be blown at this point, but if you give me a few more minutes, it'll all make sense...
Here are the steps in a nutshell (but pictured and explained below):
Step 1) Cut out a cardboard square
Step 2) Trace square all over wall with chalk
Step 3) Make diagonal lines
Step 4) Tape
Step 5) Paint
Step 6) Peel Tape
Step 7) Get Goosebumps
First of all... this was the original room. I hope the transition blows you away at the end with the big reveal... fingers crossed!
Here we go... get ready to be amazed!
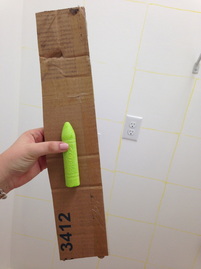
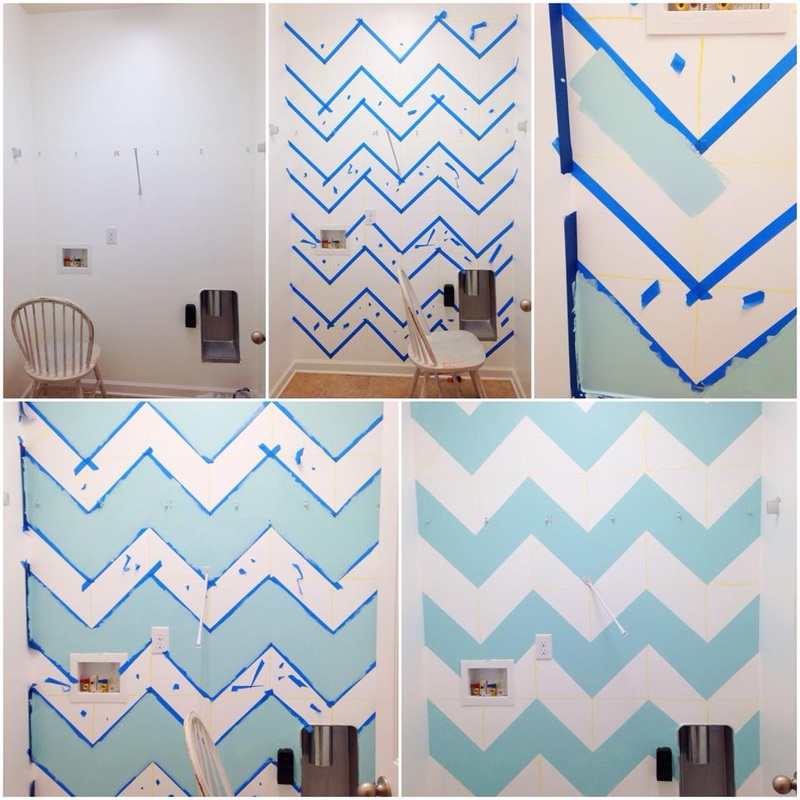
Step 1) Cut a card board box into a square. I took scissors to an old boot/shoe box. Just make sure it's a pretty even square. Grab some chalk!
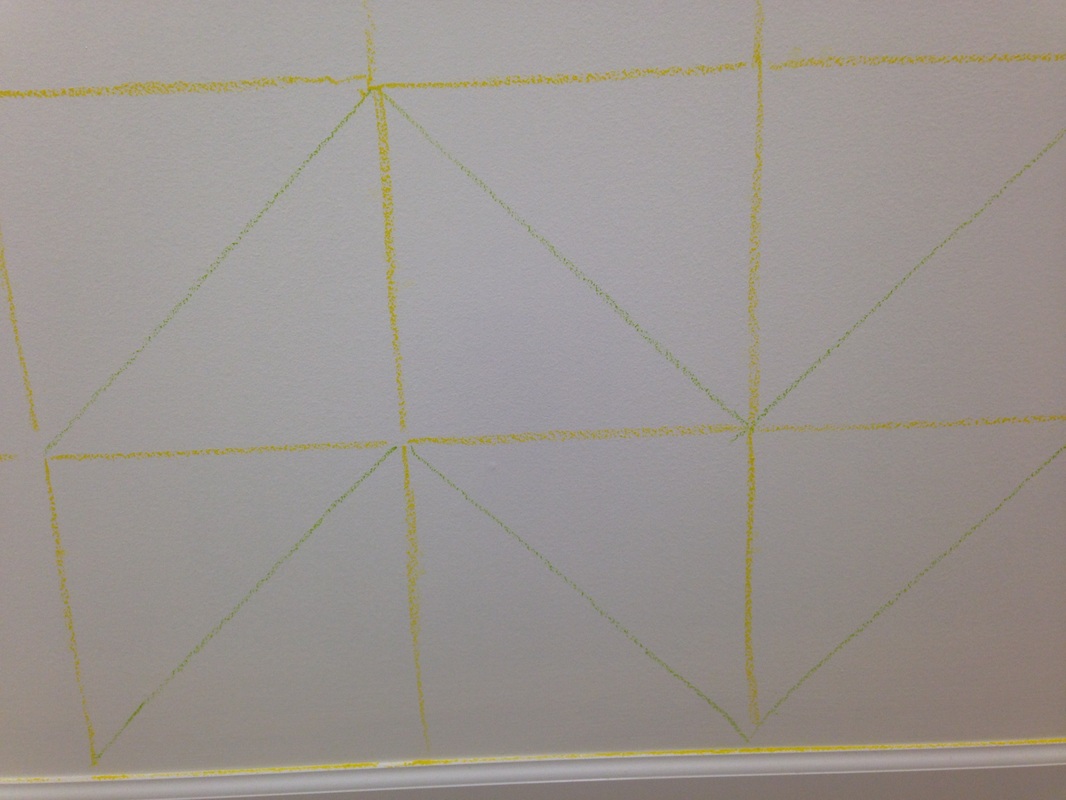
Step 2) Start tracing that square all over your wall with your chalk. It should make a grid pattern. There's no math, no measuring, just trace a square over and over and over again... we've been tracing shapes since kindergarden, so I'm pretty sure everyone who's able to read this is also capable of tracing a shape.
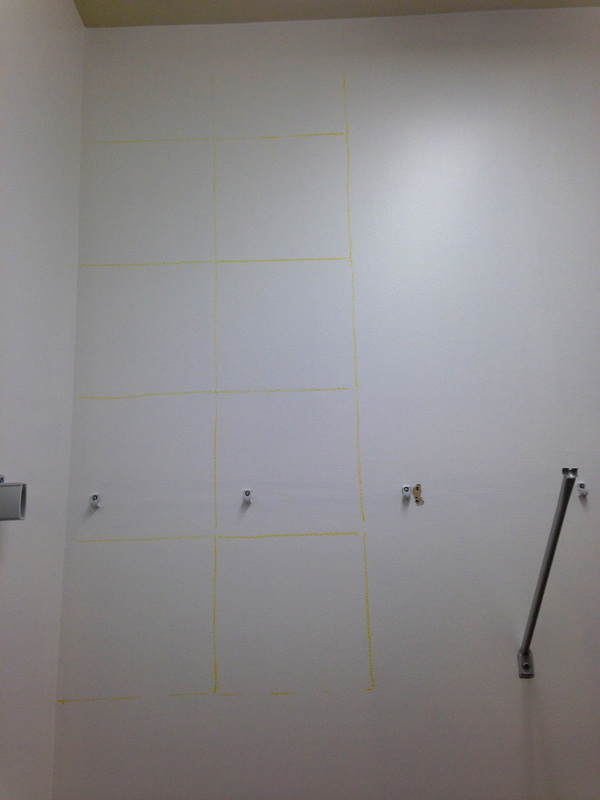
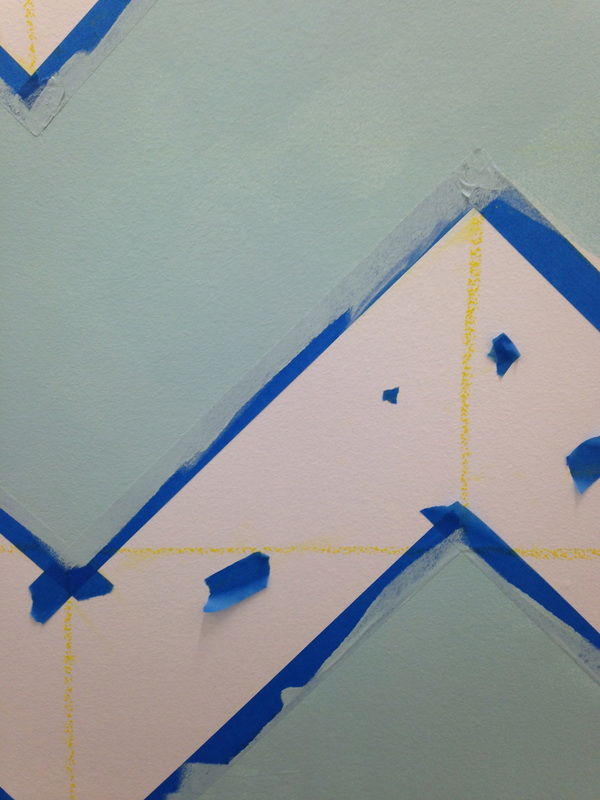
Step 3) Grab some kind of straight edge. It can be a ruler, a magazine, a 2x4, anything! I just cut off another piece of the shoe box I made my square from. Also, grab a DIFFERENT colored piece of chalk (this is crucial. otherwise, your wall will be awful). (kidding. but it really does help). Once you have these two items, draw diagonal lines in each square. Connect each line from corner to corner. In one column, if it starts in the top left, start the next one down in the top right.... are you confused? Just look at the pictures below and I promise it'll make sense. By connecting each corner to another corner, you are creating a CHEVRON PATTERN! Yahoo!! And by using a different colored piece of chalk, it really makes it easy to see the pattern starting to form.

That wasn't too bad, right??
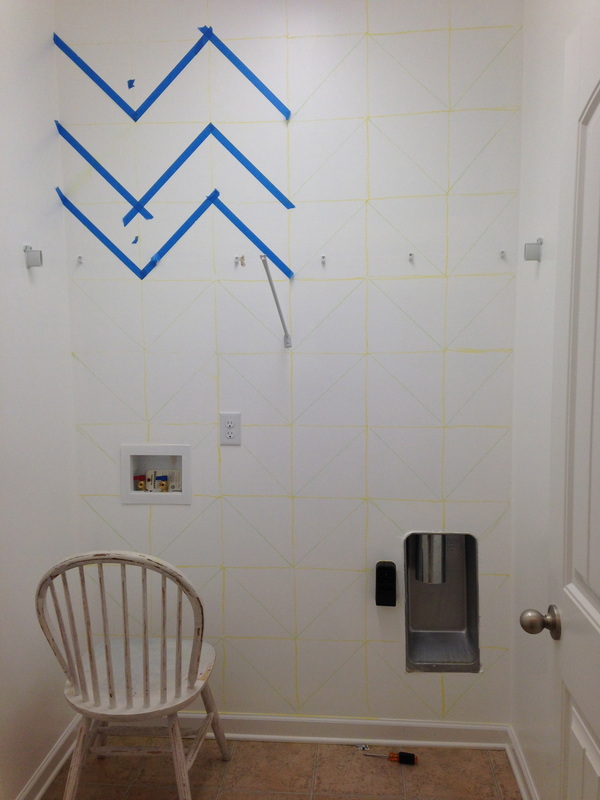
Step 4) Tape! Time to start taping. This part definitely takes the longest (aside from waiting for the paint to dry). I started taping it all off, then realized I was afraid I was going to take blue paint to the wrong row, so I put all my excess tape in every other row so I didn't mess up. Sometimes I'm a little scatter brained... so this just kind of helped me.
Step 4) Tape! Time to start taping. This part definitely takes the longest (aside from waiting for the paint to dry). I started taping it all off, then realized I was afraid I was going to take blue paint to the wrong row, so I put all my excess tape in every other row so I didn't mess up. Sometimes I'm a little scatter brained... so this just kind of helped me.

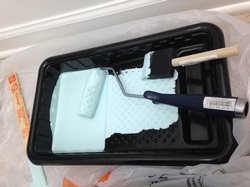
Step 5) Start painting! The back wall I decided to chevron is not huge, it's just about the right size to fit a washer and dryer... meaning, I didn't need a huge gallon of paint. Here's a great little trick: once you find the color you love, ask the Home Depot paint extraordinaire to give you a sample! It comes in the cutest little jar and is less than $5. I even had some paint left over! So this should definitely suffice if you're not painting a HUGE wall.

Once you've finished the whole wall, wait about an hour. When the paint isn't COMPLETELY dry but it's almost there... start peeling the tape. You don't want to wait until the paint is completely dry bc some of the tape might stick... no fun. Oh yeah, so Step 6) Peel Tape.

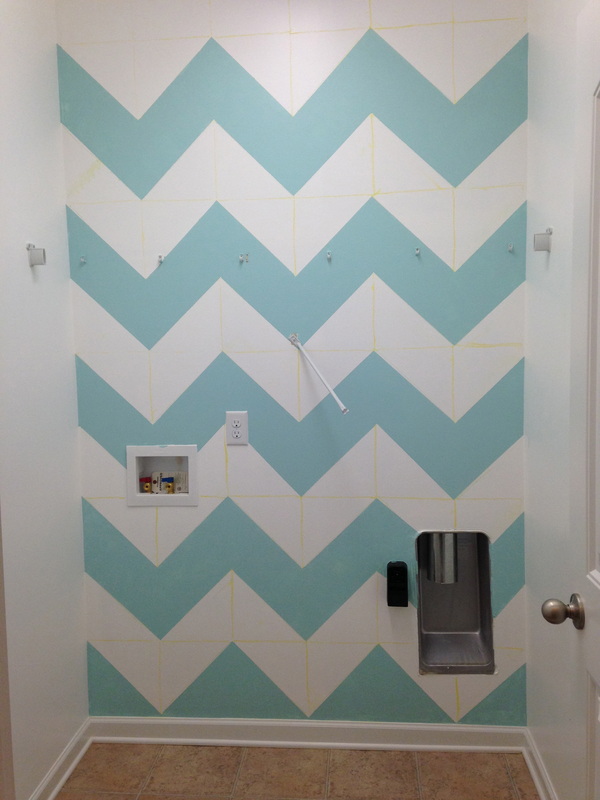
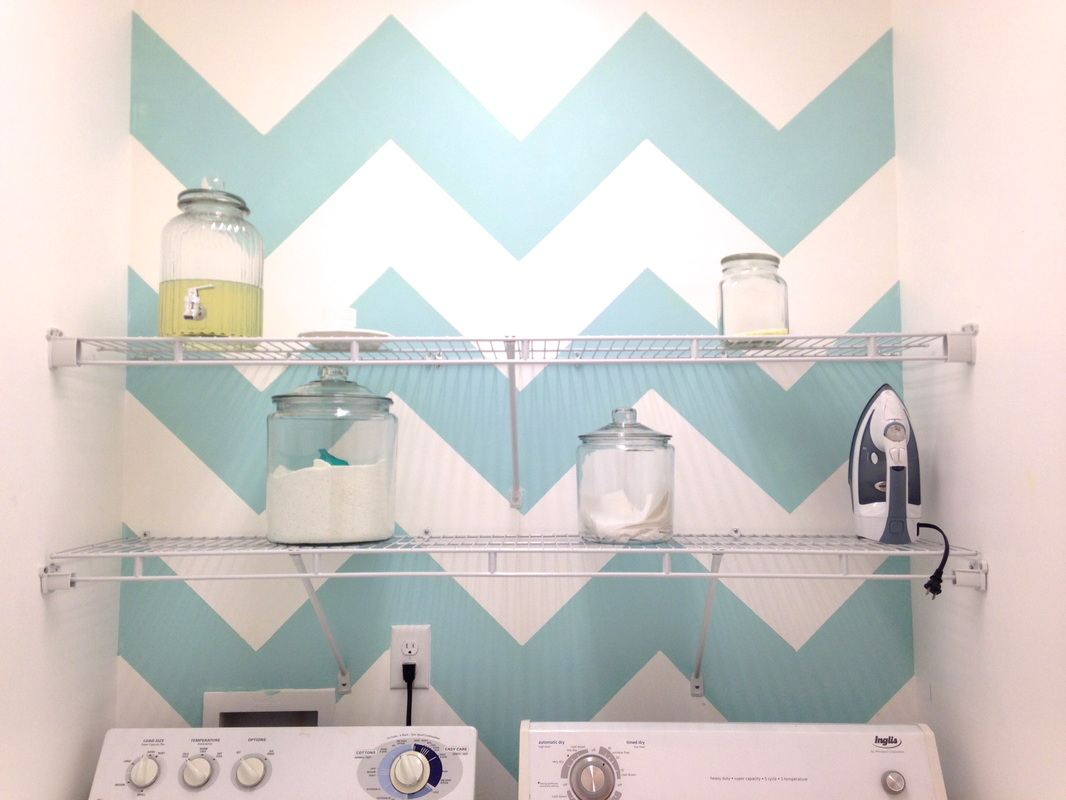
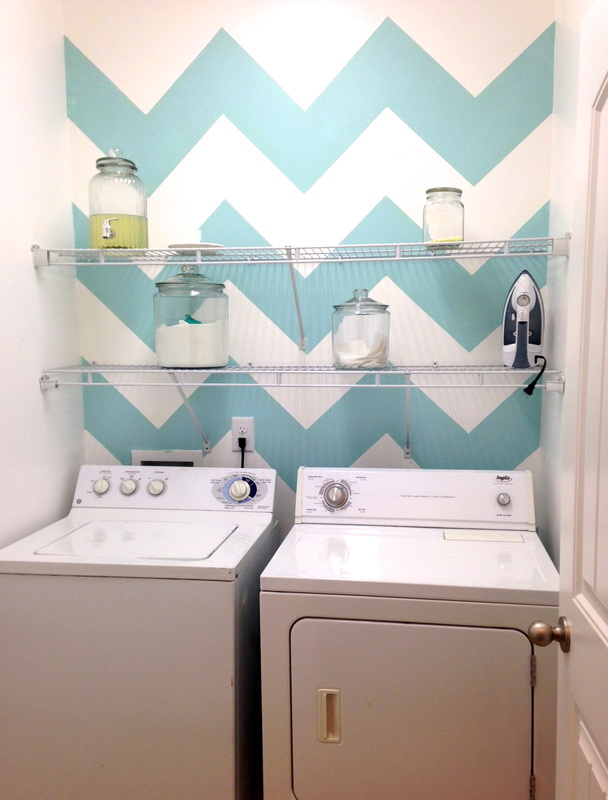
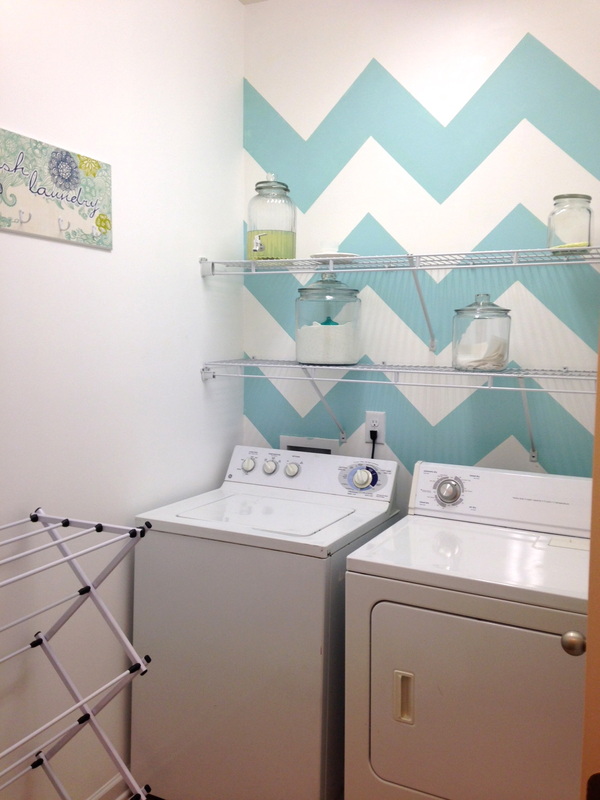
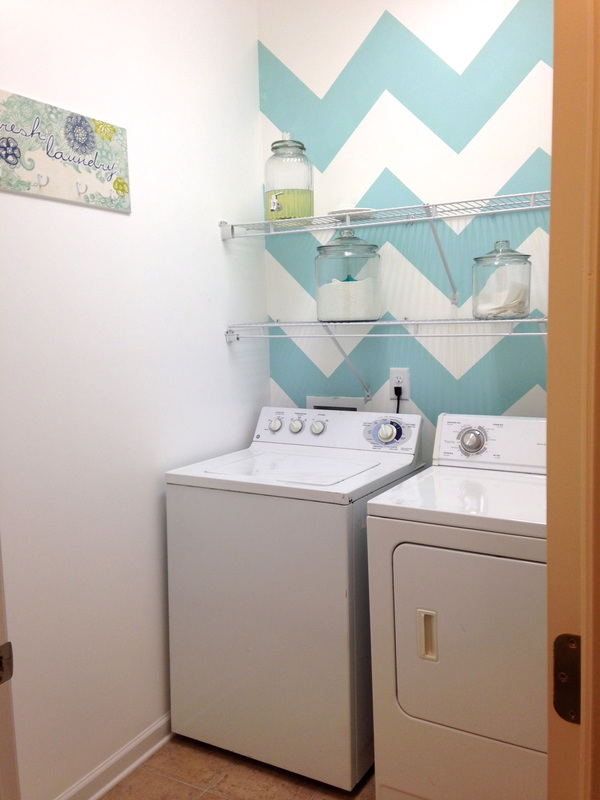
Step 7) Move your washer/dryer back in, put back up the shelves, and get goosebumps everytime you want into your new laundry room!
See?! It's as easy as that! If you have any questions or tips, let me know!
Hope you like my laundry room as much as I do... bc seriously, sometimes I just got stand in there and bask in all the glory.
xox,
L
Hope you like my laundry room as much as I do... bc seriously, sometimes I just got stand in there and bask in all the glory.
xox,
L

 RSS Feed